你可能一直在为长毛象的搜索功能太弱而苦恼,不过这种状态在 v2.7.0 后有了很大的改观。
Mastodon v2.7.0 添加了全文搜索功能。 开启全文搜索功能之后,网站用户可以很方便的搜索到想找的嘟嘟。
下面我将以 Debian 9 系统为例,介绍如何开启长毛象全文搜索功能。
安装 Java
Elasticsearch 需要 Java 8 或者更高的版本。
你可以安装 Oracle Java 或 OpenJDK,此处将使用官方仓库中的 openjdk 8。
安装 Elasticsearch
添加 Elasticsearch PGP Key
添加 APT 仓库
echo "deb https://artifacts.elastic.co/packages/6.x/apt stable main" | sudo tee -a /etc/apt/sources.list.d/elastic-6.x.list
安装 Elasticsearch
配置 systemd service
运行上述命令之后,访问 http://localhost:9200 ,确认 Elasticsearch 已经运行。
配置 Mastodon
在 .env.production 文件中添加以下行:
重启服务
创建索引
结语
完成上述步骤之后,你可以打开管理页面确认已经开启全文搜索功能。
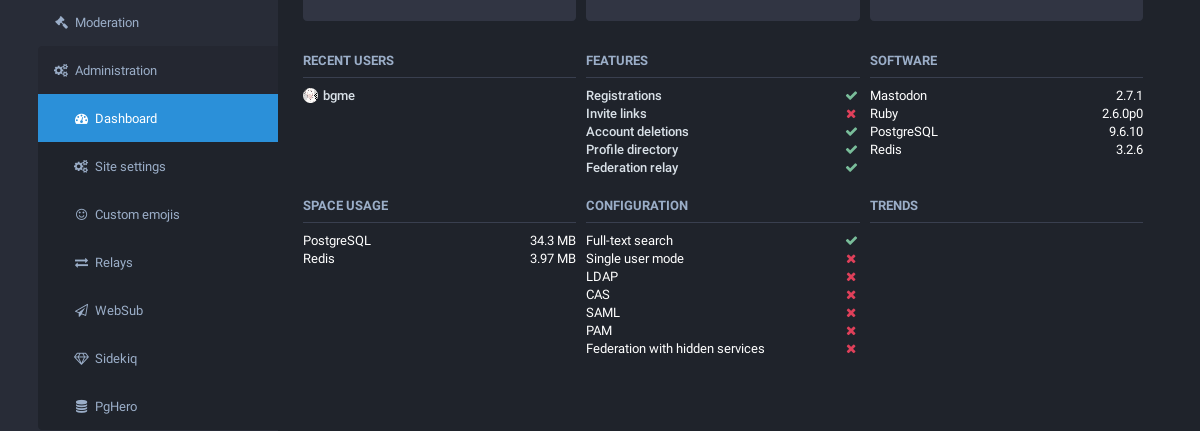
管理页面
现在,你可以尽情享受全文搜索的便利了。
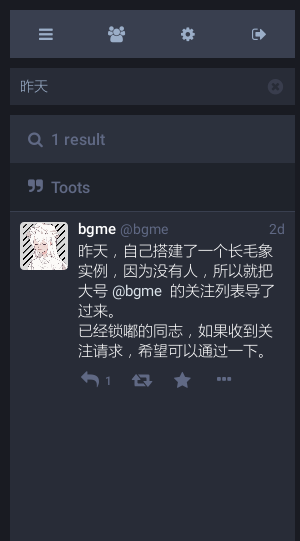
全文搜索
性能优化(可选)
首先 Elasticsearch 需要使用大量内存,你可以参考这个文档。
但是根据 Mastodon 官方的说法,实际上不需要分配这么多内存给 Elasticsearch。
当你在低内存的 VPS 上使用 Elasticsearch 时,你必须要修改 Elasticsearch 的配置文件。
修改 /etc/elasticsearch/jvm.options 文件的这些行:
# Xms represents the initial size of total heap space
# Xmx represents the maximum size of total heap space

-Xms1g
-Xmx1g
想知道该设置多少内存? 你可以参考下面的表格。
Memory |
Xms |
Xmx |
|---|---|---|
1GB |
256m |
256m |
2GB |
512m |
512m |
3GB |
1g |
1g |
4GB |
2g |
2g |
修改配置之后,重启 Elasticsearch。
中文搜索优化
ElasticSearch默认使用标准分析器,这对于中文来说可能并不太适合。为了提高搜索体验,你可以安装特定语言的专用分析器。在创建ElasticSearch索引之前执行:
安装 elasticsearch-analysis-ik、elasticsearch-analysis-stconvert 插件至 ElasticSearch。
并对源码做出如下修改:
diff --git a/app/chewy/accounts_index.rb b/app/chewy/accounts_index.rb
--- a/app/chewy/accounts_index.rb
+++ b/app/chewy/accounts_index.rb
@@ -4,7 +4,7 @@ class AccountsIndex < Chewy::Index
  settings index: { refresh_interval: '5m' }, analysis: {
    analyzer: {
      content: {
-        tokenizer: 'whitespace',
+        tokenizer: 'ik_max_word',
        filter: %w(lowercase asciifolding cjk_width),
      },

diff --git a/app/chewy/statuses_index.rb b/app/chewy/statuses_index.rb
--- a/app/chewy/statuses_index.rb
+++ b/app/chewy/statuses_index.rb
@@ -16,9 +16,17 @@ class StatusesIndex < Chewy::Index
        language: 'possessive_english',
      },
    },
+    char_filter: {
+      tsconvert: {
+        type: 'stconvert',
+        keep_both: false,
+        delimiter: '#',
+        convert_type: 't2s',
+      },
+    },
    analyzer: {
      content: {
-        tokenizer: 'uax_url_email',
+        tokenizer: 'ik_max_word',
        filter: %w(
          english_possessive_stemmer
          lowercase
@@ -27,6 +35,7 @@ class StatusesIndex < Chewy::Index
          english_stop
          english_stemmer
        ),
+        char_filter: %w(tsconvert),
      },
    },
  }
diff --git a/app/chewy/tags_index.rb b/app/chewy/tags_index.rb
--- a/app/chewy/tags_index.rb
+++ b/app/chewy/tags_index.rb
@@ -2,10 +2,19 @@

class TagsIndex < Chewy::Index
  settings index: { refresh_interval: '15m' }, analysis: {
+    char_filter: {
+      tsconvert: {
+        type: 'stconvert',
+        keep_both: false,
+        delimiter: '#',
+        convert_type: 't2s',
+      },
+    },
    analyzer: {
      content: {
-        tokenizer: 'keyword',
+        tokenizer: 'ik_max_word',
        filter: %w(lowercase asciifolding cjk_width),
+        char_filter: %w(tsconvert),
      },

      edge_ngram: {
如果已经创建索引,请运行 tootctl search deploy 重建索引,如果索引较大,本操作将花费较长时间。